To prep a yard for sod, it is important to aerate the soil before applying a layer of compost and laying down the sod itself.

Wednesday, December 28, 2016
How To Prep For Sod
To prep a yard for sod, it is important to aerate the soil before applying a layer of compost and laying down the sod itself.
Sunday, December 25, 2016
2016 Christmas Light Show
Trista Lights 2016 Christmas Light Show which was featured on Season 4 of ABC's The Great Christmas Light Fight. 17,000 computerized lights sequenced to an upbeat holiday soundtrack.
Thursday, December 22, 2016
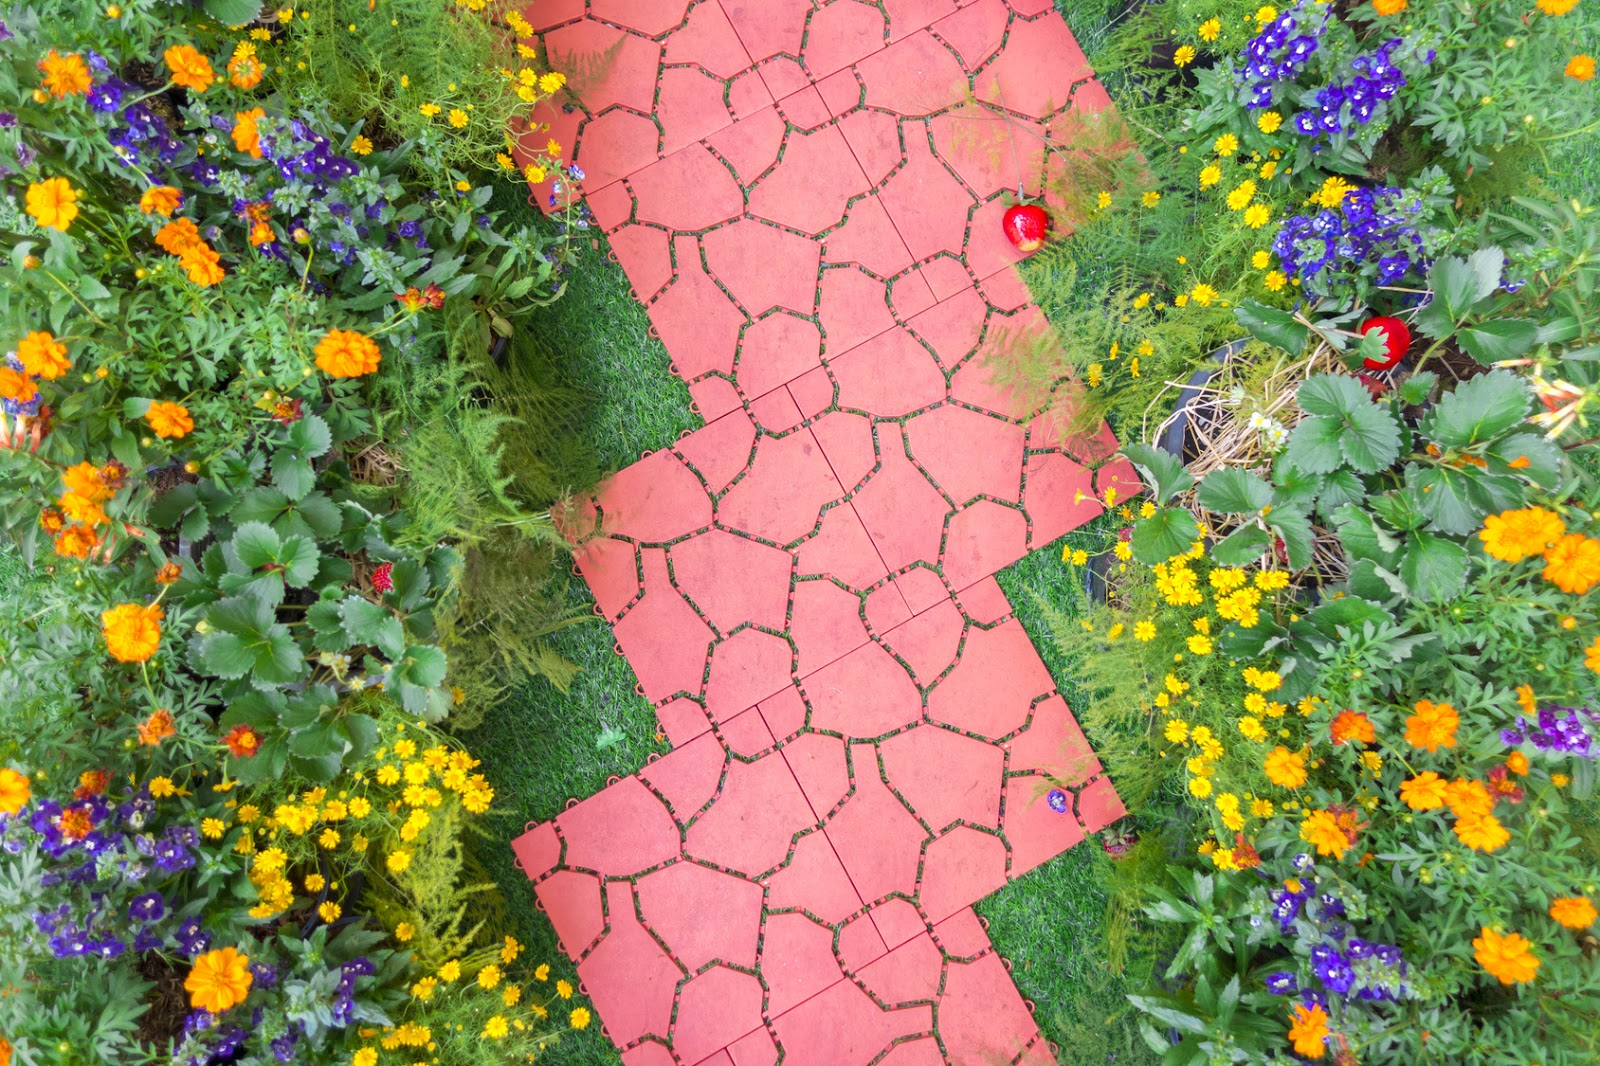
Pavestone Venetian Stone™
Pavestone's Venetian Stone™ Series gives a distinctive cleft surface texture to pavements. It's modular pattern equalizes the scale of any project and is fitting to most any architectural elements.
The possible applications for pavers are only limited by your imagination. Maximize your outdoor living experience with a design that is all your own. Create a scenic walkway in a beautiful downtown park. A variety of hues and textures allow you to have unlimited possibilities to both compliment and enhance the natural beauty of any surrounding while being friendly to the environment. From palatial outdoor entertainment areas to pool decks with a relaxing spa-like feel, you can count on unsurpassed strength and flexibility. Concrete pavers can withstand the forces of weather, water and traffic. Plus, they are especially designed to withstand freeze-thaw conditions, making them a good choice for cool as well as warm climates. Your design project will be as beautiful years from now as it is the day it is installed.
Monday, December 19, 2016
Unique Creative DIY Holiday Wreath Ideas | HGTV
Find more great holiday decorating, design and craft project ideas from HGTV:
HGTV Videos http://videos.hgtv.com/
Friday, December 16, 2016
How To Use Landscaping Rocks

Adding rocks to your landscape can definitely add an aesthetic appeal, but they can also be a practical addition too. You can use landscaping rocks to brighten a shady garden or to add texture to a flower bed. Here are a few tips on how to use these rocks to your landscaping's best advantage.
First off, remember that choosing the right landscaping rocks for your yard is important. You can use white rocks to brighten areas that don't get a lot of sun, or you can use landscaping rocks to complement what is already in your garden. For example, for gardens that incorporate a lot of tropical flowers, you could consider using terra cotta stones to give it more of that island feel. If you're going for a more minimal look and feel, you might consider black landscaping rocks. Make sure you have a look or theme in mind when choosing what stones to use.
One more thing to keep in mind: whatever color or style you choose, make sure you like it. You're going to have to live with it for many years to come unless you want to go through the hassle of choosing new landscaping rocks within the near future. Be sure you know what you want and get exactly what you are looking for. It's okay to be picky in this scenario.
Landscaping rocks do not require a lot of maintenance. You should probably keep an eye on them just to be sure they stay even on the ground, and you might want to check them after a particularly bad storm, but overall, they should be maintenance free. They're a great way to add durability to your groundcover. They are more permanent than mulch and they definitely do not require as much maintenance. You will not have to worry about adding new landscaping rocks every season (not unless you want to!).
Finally, remember that landscaping rocks are not restricted to using just on the ground. Rocks can be used in a variety of ways: as retaining walls, as a patio, as an outdoor fireplace or fire pit: the ideas go on and on. You can use the Internet as inspiration, or you can simply take a walk through nature and try to emulate some of what you see in your own landscaping. Your imagination is the limit, so try to come up with some ideas you know you'll enjoy for years to come!
Article Source: http://EzineArticles.com/9241709
Tuesday, December 13, 2016
How To Build A Flagstone Walkway
This Old House landscape contractor Roger Cook shows how to rescue an old stone walkway.
Saturday, December 10, 2016
When You Stop Being Cold and Genuine. Merry Christmas!
Artificial grass is always green even when it's freezing cold. Merry Christmas and Happy New Year from Global Syn-Turf, the leading manufacturer of synthetic grass in the United States!
Wednesday, December 7, 2016
How To Prep Concrete With 3in1 Prep
3in1 Prep is the ultimate etching, cleaning, and degreasing formula all in one solution. Typical etching solutions require a cleaning solution or degreasing solution after the concrete has been etched. Stop using multiple steps when prepping concrete and start using 1 solution with 3in1 Prep.
Sunday, December 4, 2016
Perk Up Your Landscape With Mulch

Mulch has to be the single best thing you can do for your plants and have such grand results from. You can take a drab landscape, apply mulch around the plants and garden areas and by evening, that same drab landscape looks as though has been professionally maintained.
The sole purpose of mulch is to protect the soil. It should allow enough air space and for water to percolate down to the ground. There are 2 types of mulches: Organic and Inorganic.
Organic Mulches consist of:
- Wood chips
- Aged compost
- Aged manure
- Shredded Leaves
- Grass clippings
- Pine bark
- Pine needles
- Pecan shells (if you're near a factory)
- Straw (not hay as it has weed seed)
- Groundcover (phlox, vinca, purple wintercreeper, pachysandra, liriope, mondo grass, etc)
Inorganic Mulches consist of:
- Rocks
- Pebbles
- Gravel
- Crushed stone
- Crushed lava
- Black plastic
- Landscape cloth
- Ground rubber tires
- Other recycled materials
Reasons for mulching are almost unlimited. We are going to cover only a few of them. It creates enough of a defined area around trees and shrubs so that anyone with a mower or weed eater will avoid damaging the plants, and that maybe the most common reason as to the demise of younger plants. Mulching reduces and often eliminates the weed population. It insulates the soil by keeping it at a more even temperature, which is especially helpful during the spring temperature fluctuations. Mulch keeps the soil immediately around the plants cooler and moister. Organic mulch decomposes into the soil building up the nutrient values, thus reducing the need for applying fertilizer. It prevents the soil from compacting and crusting. Mulch helps to grow healthier plants and makes the landscape look neater, cleaner and more attractive.
Studies show that trees and larger shrubs without any grass up to 3 feet away from the base of the plants will increase their growth.
Too little mulch is not effective; on the other hand, too much mulch can kill a good thing (namely plants). Rather than going through a long drawn out explanation of why, when, where and with what, let's keep it simple, safe and easy to remember!
The Triple 3's to Mulching-
- 3 inches thick
- 3 feet out from the base of the plant
- 3 inch doughnut around the base of the plants (see below)
So, that's 3 deep, 3 out and 3 for the doughnut. Now, what about this doughnut? The doughnut is the welled area at the base of the plant. For proper air circulation and watering, 3 inches (roughly) is needed between the trunk of the plant and where the mulch actually begins. Mulch should never come in contact with the trunk of a shrub or tree, even in a garden setting. Stay away from the volcano look. It is a sure fire way to kill your plants. You want to keep the mulch at an even level all the way through, whether it's going 3 feet out from the trunk or in a large landscaped area. Remember: Keep It Level
How often to apply mulch really depends on the type of mulch you have chosen. Something light such as grass clippings or shredded leaves will have to be added to quite frequently as it decomposes quickly. Heavier mulches may only need to be freshened once a year. Shredded bark mulch applied in spring at 3 inches may decompose over summer, so when fall comes around, you will want to check it and possibly add more to bring it back up to the 3 inches to go over winter.
What mulch goes where!? I don't recommend using gravel or other stones as mulch in a planting area between a walk and building foundation. Several things are wrong with this picture. There are too many materials with a high level of lime. Lime often leeches out of the concrete blocks used in most foundations, of course, it's the dusting on the gravel and what are concrete walkways made of? Using this is fine as long as you don't put any plants there. Container gardening will work, but no ground planting.
Also, think about where inorganic mulches will be used before you purchase. For example, you wouldn't want to use some inorganic mulch around plants that are in full sun. Many of the inorganic types, especially rocks, gravel, and crushed lava will absorb and then radiate the heat. This can damage plants if not burn them. For areas in full sun, it is best to use organic mulches.
After absorbing this mulch information, you are probably now wondering how much mulch to get. You will need to calculate the surface area that you want to cover (square footage).
There are 27 cubic feet in a cubic yard. One cubic yard will cover 324 square feet with one inch of mulch. Calculate the square footage of the area you want to cover.
Take your surface square footage and multiply it by the depth you want to mulch (remember we talked about 3 inches) Now, that total is divided by 324 which will give you the total number of cubic yards that you will need for the depth that you want.
Article Source: http://EzineArticles.com/3890759
Thursday, December 1, 2016
Monday, November 28, 2016
Rock Landscaping Made Easy

Rock landscaping gives you another advantage of revealing the real beauty of nature using the magnificent effect of the various landscape boulders. These landscaping rocks also help change the look of your place without having to add too many plants just to have an elegant appeal.
Boulders, stones and pavers are great materials to be used with this kind of landscaping style. However, planning is still very important in every project you need to accomplish that you have to gather more of your creative wits and talents in managing your layout that will suit your home and lawn perfectly the way you want it to be.
The first thing you need to look at is the general appearance of your home in relation your front and backyard, your garden and the lawn. Consider your budget to fit your desired landscape plan. If you have a vast amount of resources and money, you may be thinking of having a major makeover to your residence by now. Consider repainting your house from both the indoors and outdoor walls. Colors and design must match with your desired landscaping layout. Your ability to use your photographic memory and visual skills coupled with the knowledge of using landscaping symbols become excellent layout foundations for your desired landscaping project.
Landscaping with stones and rocks may give you a cheaper cost. Yet, if you prefer some stylish variants like concrete pavers, stamped concrete, paving stones, stone tiles and bricks, you need to raise your budget reasonably. If you will introduce some new plants with your rock landscaping project, make sure that it will excellently compliment with the size, texture, color and shapes of your stones, boulders or pavers. There should be balance and harmony within every aspect of your landscaped environment that will not only match your house but would even add more beauty to the entire neighborhood at both daytime and nighttime. The surroundings should not only add beauty and elegance but must also promote green living in its best qualities.
Article Source: http://EzineArticles.com/5437250
Friday, November 25, 2016
Modern Patio Design
Get ideas for modern patio design. See how concrete, pea gravel, and decomposed granite are used on this modern patio design to create a look that ties into the rest of the yard.
Saturday, November 19, 2016
How To Make An Outdoor Concrete Fire Pit
This modern outdoor concrete fire pit is can be built over a single weekend and is great centerpiece for outdoor entertaining. This is not a difficult project but is time consuming and labor intensive. Concrete fireplaces and fire pits should be constructed carefully. When exposed directly to high amounts of heat the moisture trapped inside concrete can expand causing the concrete to crack and in extreme situations explode. I lined the inside of the fire pit with fire brick and filled the bottom with lava rock to ensure that the majority of the heat form the fireplace is not coming in direct contact with the concrete. Please check out my website for more detailed instructions.
Wednesday, November 16, 2016
How To Start A Flower Garden
Starting a flower garden is a great landscaping idea to beautify your yard or add to an existing garden. Learn how to design, amend and plant a new flower garden in this how-to video from About.com.
Sunday, November 13, 2016
Ideas For Patios
An inspirational film filled with ideas for patios with expert advice and top tips to help you complete the job with confidence.
Thursday, November 10, 2016
Pavestone Venetian Stone™
Pavestone's Venetian Stone™ Series gives a distinctive cleft surface texture to pavements. It's modular pattern equalizes the scale of any project and is fitting to most any architectural elements.
The possible applications for pavers are only limited by your imagination. Maximize your outdoor living experience with a design that is all your own. Create a scenic walkway in a beautiful downtown park. A variety of hues and textures allow you to have unlimited possibilities to both compliment and enhance the natural beauty of any surrounding while being friendly to the environment. From palatial outdoor entertainment areas to pool decks with a relaxing spa-like feel, you can count on unsurpassed strength and flexibility. Concrete pavers can withstand the forces of weather, water and traffic. Plus, they are especially designed to withstand freeze-thaw conditions, making them a good choice for cool as well as warm climates. Your design project will be as beautiful years from now as it is the day it is installed.
Monday, November 7, 2016
Landscaping Ideas For Front Yards
Landscaping ideas for front yards, DIY Network photos of front yard landscaping designs and get ideas for your own garden. See how some creative front lawn landscaping ideas resulted in dashing new looks for two yards.
Friday, November 4, 2016
Lawn Care & Design : How to Design a New Landscape
Design a new landscape for a garden by considering certain factors, such as the amount of sunlight, adding character to a flower beds, the budget and design of walkways or patios.
Tuesday, November 1, 2016
Saturday, October 29, 2016
Halloween Decor DIYs | Room Decor or Party Decorations 2016
Here's some spooky halloween themed room decor diys that you can use as decoration for your bedroom or for parties. These halloween decorations are budget friendly, easy and cheap to make. Hope you guys have a great halloween!
Wednesday, October 26, 2016
Fire Bowl Design Ideas
http://www.landscapingnetwork.com Fire features for outdoor rooms are growing in popularity as a way to add ambience, lighting and warmth. See how to use a fire bowl as a backyard focal point by filling it with decorative stone or colored glass, enhanced by a gas-lit flame. Also get tips for fire bowl placement and flame height.
Sunday, October 23, 2016
Front Yard Courtyard & Water Feature
This rectangular water feature adds soothing sound and drama to a small courtyard. It's cleverly incorporated into a privacy wall, with water flowing from a notch in the wall. The walls of the water basin are made of sand-washed concrete in gray and beige.
Thursday, October 20, 2016
How To Grow Culinary Herbs
Shopping List for How to Grow Culinary Herbs:
- 6-inch clay pot
- Soil with compost and perlite
- Chives
- Parsley
- Tarragon
- Mint
- Rosemary
- Thyme
- Oregano
- Basil
Tools for How to Grow Culinary Herbs:
- Gardening gloves
Steps for How to Grow Culinary Herbs:
1. Fill up clay pot about half way with soil with compost and perlite.
2. Remove the herb plant from its temporary plastic pot and tease out the roots gently, then place it in the clay pot.
3. Fill in empty space with more soil. Don’t pack in soil too tightly.
4. Put a quick pour of organic fertilizer in a watering can and give the plant a good soaking.
5. If you’re grouping herb plants together, try to group them together in accordance with needs. For example, chives, parsley and tarragon all require about six hours of sunlight a day and need to stay moist.
6. Rosemary, thyme and oregano can also be grouped together. They like about six to eight hours of sunlight and can dry out a bit.
7. Always plant mint alone because it will spread out and take over anything else that’s in the container.
8. To harvest, let your herbs grow to be about six inches tall.
9. Basil can be pinched off at the top to encourage new growth.
10. Parsley can be pinched off on the outside with the new growth coming from the center.
11. Chives can be cut right off the top like a haircut.
12. If the herbs are not getting enough sunlight, consider buying a grow light as a supplement.
Monday, October 17, 2016
How To Seal Concrete with SmartSeal and SharkSeal
NewLook has a number of water-based and solvent-based sealers. SmartSeal & SharkSeal are two of our most popular water-based sealers.
SmartSeal is a low VOC water-based sealer water-based formula is used to protect all NewLook concrete stains, properly prepared concrete floors, pool decks and other concrete and masonry surfaces. SmartSeal WB dries quickly and, once cured, creates an abrasion-resistant film that provides weatherproof protection against sun, rain, most acids, industrial chemicals, oil and grease.
SharkSeal™ is a water and oil repellant penetrating sealer with color enhancing properties. It penetrates deep into interior or exterior concrete, stone and pavers, yet is compatible as an enhancing sealer over NewLook color stains. Easily clean surfaces with SharkSeal™ as it repels dirt, dust and resists stains from most common spills including dirty auto fluids, beverages and many other fluids. Prolongs the life of concrete affected by winter freeze-thaw cycle and salt intrusion.
Friday, October 14, 2016
Garden Edge
We wanted to put cedar chips around our garden boxes. The west side drops to the neighbors property and I did not want cedar chips falling over the property line. I decided that I could put bark mulch next to the property line. This meant I needed an edge between the bark mulch and the cedar chips. I made the edge out of wood I had slabbed a few years ago from an enormous sequoia tree. I secured the wood in place by nailing it to the ground. I drilled holes in the wood for the nails and made a space for the head of the nail in the wood. This allowed the head of the nail to be flush with the top surface of the wood.
Tuesday, October 11, 2016
Picking Your Wooden Deck

If you want to lighten or add a different tint to your deck's wooden flooring, pickling it could be the solution. Instead of replacing the entire deck floor with a light-colored wood, you have this inexpensive alternative. The good news is you can easily pickle it yourself by following these five easy steps.
Before starting, prepare lots of sandpaper and absorbent rags (lint-free), a wide paintbrush, a bristle brush, a lambs-wool wax applicator, and enough varnish and paint for the entire deck floor. For toluene or alcohol-based varnish, protect yourself against toxic gases with a face mask. Oil-based paint is easier to use on your deck because they take longer to dry. If you want latex for the deck, dilute it in paint thinner at a 25/75 ratio. Stick with flat finishes since gloss tends to outshine the deck's textured wood. For larger decks, use a power sanding device. Otherwise, it would take forever to finish the entire deck.
1. Remove the existing finish of your deck flooring. Be careful in using the power sanding device as it might chip or damage the deck's floor. Sandpaper the deck on hard to reach spaces. Once the finish has been completely removed, the deck's surface could be too coarse for you. Use fine sandpaper to make it smoother. Clean up thoroughly afterward. Make sure to vacuum the entire deck, especially the corners, to ensure a clean paint job.
2. Paint the deck. Evenly spread the paint onto the wood. Don't worry about direction since that won't matter later. Leave the deck to dry for 20 to 60 minutes.
3. Using the rags, wipe off the paint in circular motions. The amount of paint you rub off will dictate how light the deck stain will be. Smooth out any clumps of paint with the bristle brush.
4. Smooth the deck floor with the power sanding device and sandpaper. Remember to rid it of all sawdust before moving on to the next step.
5. Apply a couple of coats of varnish to finish. Don't forget to use the face mask for non-yellowing varnish. Use the wax applicator to achieve a polished veneer.
Remember that the colors you choose will blend with the original color of the deck flooring, acting like a sheet of colored cellophane. White paint over cedar will give it a pinkish hue. A purplish one would show if blue paint was used. Different varnishes also affect the deck flooring's in different ways. Oil or polyurethane varnishes can darken the wood and make it yellow over time.
Be creative with the colors and make it complement or contrast the rest of your deck. That is pretty much the 5 step process for pickling your wooden deck.
Article Source: http://EzineArticles.com/6397574
Saturday, October 8, 2016
Creating Beautiful Landscapes With PAVESTONE
The possible applications for pavers are only limited by your imagination. Maximize your outdoor living experience with a design that is all your own. Create a scenic walkway in a beautiful downtown park. A variety of hues and textures allow you to have unlimited possibilities to both compliment and enhance the natural beauty of any surrounding while being friendly to the environment. From palatial outdoor entertainment areas to pool decks with a relaxing spa-like feel, you can count on unsurpassed strength and flexibility. Concrete pavers can withstand the forces of weather, water and traffic. Plus, they are especially designed to withstand freeze-thaw conditions, making them a good choice for cool as well as warm climates. Your design project will be as beautiful years from now as it is the day it is installed.
Wednesday, October 5, 2016
Sunday, October 2, 2016
How To Stain Concrete with NewLook's Endura Solid Stain
NewLook Endura Solid Stain is a single component concrete stain that is highly durable and easy to use. Developed to stain concrete, restore faded concrete or maintain concrete, Endura Solid Stain is affordable while being premium in quality & performance. The product is contractor grade and compatible with NewLook's extensive line of products.
Thursday, September 29, 2016
TrowelPave Concrete | City Sidewalk Repair
In this video short, we showcase yet another common problem to fix with TrowelPave. If you've ever walked a tree-lined city sidewalk then you've undoubtedly noticed some cracks and lifted concrete. The damaged areas are usually painted to alert the hazard, and there's a reason they don't get fixed properly.
That reason? There isn't a good fix! Until now. TrowelPave Concrete is a kit that contains a specialty blend of aggregates and a liquid binding agent. Once mixed together in a wheelbarrow or paddle mixer, the blended material trowels easily into place over uneven and jagged areas. Compacting can be done by hand with a trowel in tight spaces, or a hand tamper in larger areas.
In this situation, a panel of city sidewalk had been lifted approximately 2" - 3" by roots from a nearby Redwood tree. Fixing a problem like this with concrete is expensive and labor intense. It would require jack-hammering the section out; re-forming for a fresh pour; pouring and finishing new concrete; and allowing to cure for several days before foot traffic is allowed.
With TrowelPave Concrete, we were able to fix the area in approximately 20 minutes, and open it to foot traffic within the hour. We used (1) 40-pound TrowelPave bucket kit to build a free-form ramp that spans nearly 5' in width, 3" in height, and 10" in depth.
The newly formed ramp looks natural because of its similar color adjoining the two concrete sections. The tripping hazard is gone now and the area is safe for foot and bicycle traffic.
Monday, September 26, 2016
SharkSeal Penetrating Concrete Sealer
SharkSeal™ is a water and oil repellant penetrating sealer with color enhancing properties based on a blend of complex resins including nano-enhanced fluoropolymers. It penetrates deep into porous surfaces such as interior or exterior concrete, stone and pavers, yet is compatible as an enhancing sealer over NewLook color stains. Easily clean surfaces with SharkSeal™ as it repels dirt, dust and resists stains from most common spills including dirty auto fluids, beverages and many other fluids. SharkSeal has low VOC’s and will not blush or yellow. Prolongs the life of concrete affected by winter freeze-thaw cycle and salt intrusion. SharkSeal™ is breathable, dries quickly, with strong abrasion and chemical resistance, and good hot/wet tire pickup resistance. It also enhances the color of the substrate when it is applied in two wet-on-wet coats.
Features & Benefits
- Indoor & Outdoor Use
- Low VOC
- Repels water
- Repels oil
- Repels dirt
- Reduces freeze/thaw damage
- Use on concrete, pavers & stone
- Water, oil & stain repellant
- Works over water-based or acid stains
- Non-yellowing or blushing
- Good hot/wet tire pickup resistance
- Breathable, dries quickly, with strong abrasion and chemical resistance
Friday, September 23, 2016
5 Fall Home Decor DIY Projects
Time for 5 Fall Home Decor DIY Projects! Living in California, I miss the Fall season and feeling chilly. To bring the Holiday cheers into my household, I came up with some simple and creative ways you can decorate your home with 5 different room decor DIY projects. If you are looking for new ideas to decorate your home this Fall time, try out these 5 easy and creative projects you and your family can make together.
DIY 1: Pumpkin Planters
Craft Moss
Pot pf Flower or Succulent
A foam pumpkin
DIY 2: Marble Pumpkin Painting
White, black paint
Sponge
Narrow brush head
DIY 3: Abstract Golden Wall Art
Canvas - size of choice
Acrylic Paint
DIY 4: Feather Banner
White feathers
Gold paint
String
DIY 5: Faux Fire Place
Large Lanterns - I bought mine from Joann's
Candles - found the large ones from Home Goods
Tuesday, September 20, 2016
Saturday, September 17, 2016
TrowelPave Product Demo | Blacktop Asphalt Pavement Repair
TrowelPave is a free-form leveling compound for asphalt pavement and concrete repairs. The patented installation technology is commonly used for potholes, cracks, jagged edges, and ADA compliancy repairs. TrowelPave is a DIY and Contractor repair kit available in two handy sizes, 20 or 40 pound reusable buckets. The environmentally safe mix trowels into place by hand and smooths over jagged surfaces forging a bond strong enough for heavy equipment traffic.
Learn More: http://technisoil.com/trowelpave.html
Wednesday, September 14, 2016
Sunday, September 11, 2016
Courtyard Garden - Designing Courtyard Gardens
Courtyard gardens and garden design. This Mediterranean landscaping project video is the first in a series covering an extensive landscape and garden design from start to finish.
Thursday, September 8, 2016
Silverstone 3/4" Crushed Decorative Rock at Dixon Landscape Materials
This is Silverstone 3/4" crushed decorative rock and it has become very popular. We think it is so popular because of the beautiful colors with blue, green, gray, streaks of white. It looks good wet or dry and is easy to install.
Call Dixon Landscape Materials at 707-678-8200, and visit their website at www.dixonlandscape.com.
Monday, September 5, 2016
Friday, September 2, 2016
How to Build a Pondless Waterfall
Shopping List for How to Build a Pondless Waterfall:
- Pondless waterfall kit that includes pump, liner, and pipe-
- Closed-cell black spray foam
- Boulders
- River rocks
- Mulch
Tools for How to Build a Pondless Waterfall:
- Shovels
- Utility knife
Steps for How to Build a Pondless Waterfall:
1. Dig a large area for the plastic blocks, and include a deeper area for the pump vault.
2. Square up the sides of the basin and level off the bottom.
3. Lay down landscape fabric as a first layer.
4. Lay down waterproof rubber membrane.
5. Place plastic boxes and pump vault in basin and reservoir to serve as a base.
6. Fill in the remaining spaces with some river rocks.
7. Place pump in basin and connect pipe to spillway.
8. Place boulders in area to form the waterfall.
9. Fill voids between boulders with black expanding foam that will direct water so that it’s visible over the stone.
10. Fill the rest of the bed with river rocks.
11. Trim off excess liner around the edges with a utility knife and fold the liner onto itself to create a slight dam.
12. Plant in landscaping and cover area with mulch.
Tuesday, August 30, 2016
How to Make Salsa | Easy Homemade Salsa Recipe
Today, I'll show you how to make mild salsa at home. This pico de gallo is an awesome healthy snack idea.
FULL RECIPE: http://bit.ly/fablunchsalsa
Saturday, August 27, 2016
Ideas For Creating Wonderful Backyard Patio Designs

People who have a lot of space outside their homes will sometimes want to create a more beautiful area where space can be better optimized. Many homeowners today are always looking for ways to entertain outside their home in style and comfort. Several cost-effective ways exist in which people can do this. One could choose to carry out backyard patio designs and choose to do it on a do it yourself basis. The secret to success is to be imaginative and open to new ideas and products when it comes to organizing the design for an outdoor space.
Decide what each area in the space will be used for then measure each space so that you have the option of putting different pavers or designs in specific areas of your yard. Doing this will enable the homeowners to know precisely is needed for successfully creating a unique and distinctive theme. When each space is individually measured and individualized, furniture, plantings and style can be distinctive and unique, yet create a continuity in the total design concept. Smaller areas can easily be designed as chat areas with small pieces of furniture to make the area more cozy. Larger spaces can accommodate fireplaces, lounge furniture, a bar and more.
Homeowners can add their own personal touch to the design. Adding plants, cushions to seats, and colorful flowers to add vibrancy to the area. Bird feeders and wind chimes are a wonderful way to include mood and nature in the space you are creating.
Spending time planning the design of your patio will give you the ability to add your personal style and unique designs to the space easily. Weekends will become much more fun when entertaining family and friends. Homeowners will have quite a time selecting the items, as there are so many to choose from. This could be the most challenging part of the exercise.
Some homeowners may not have the ability to visualize how this area can look. If this is the case then it is always possible to hire a professional to give some advice as to how the place can look.
Homeowners can step up to the challenge of designing a look that is both stylish and unique. Home improvement companies are on hand for homeowners to browse to see what is available. Personnel at these companies are trained to give the best advice and answer all the questions that homeowners may have about backyard patio designs.
Article Source: http://EzineArticles.com/5467226
Wednesday, August 24, 2016
Installing Pavestone Edgers
http://www.pavestone.com - Whether you are planning on doing it yourself or wanting to have it done for you. Our product videos and how-to information section is a valuable resource to start you on the right course.
Sunday, August 21, 2016
Mixing & Installing Translucent Color Enhancer
The Translucent Color Enhancer is not a solid or opaque stain. It's translucent, meaning you can see through it. This is why the Enhancer is used to restore or revitalize exposed aggregate! The translucent Enhancer color allows the aggregate to show through the tint.
Thursday, August 18, 2016
The Benefits Of Using Flagstones In Patios

People who are looking for the perfect material for a high end patio definitely should consider using flagstone. Using artificial or synthetic materials for your patio is not advisable. The most obvious reason for using natural materials like flagstone is the fact that they are, of course, more attractive than synthetic ones.
Flagstones are an excellent choice because of their natural beauty. This material lends an air of elegance to any project. Flagstones are especially ideal for patios and walkways because of their appearance and inherent durability. Using these kinds of stones will surely provide a natural elegance to your home.
One of the reasons why people prefer flagstones over other kinds of materials is its natural vintage look. These stones come in many different colors such as grey, red, blue, green and even white. They have a certain kind of shimmer that is quite pleasing to the eye. Some people like to mix and match different colors, shapes and sizes of flagstones to create a unique patter, You can also mix flagstones with other kinds of stones to create a wonderful effect.
Flagstones comes in different sizes. If you are going to use for a patio though then you should use a stone that is around two inches thick. Sand and stone dust is usually used as a base material for a flagstone patio. You can actually install flagstones in your patio yourself, provided of course that there are people with you that can help. Installing a flagstone patio can actually be a fun activity but the greater joy of course would come while you are viewing your new beautiful flagstone patio.
Article Source: http://EzineArticles.com/2814570
Monday, August 15, 2016
Clean And Seal A Flagstone Walkway
NanoPave Hardscape Sealer is a water-based, VOC-free, nano-polymer sealant for hardscape surfaces including pavers, bricks, natural stone, and flagstone. It is also commonly used to seal decorative stone ground cover materials such as river cobble, beach pebbles, and specialty aggregates. NanoPave Hardscape Sealer enhances the natural color of hardscape materials and ground covers.
NanoPave Hardscape Sealer enhances and protects the natural beauty of hardscape surfaces using an ultra-high clarity, nano-polymer sealer technology. With excellent adhesion to both porous and dense surface materials, it provides protection without blushing, yellowing, or cracking. It's a breathable sealer that applies easily to interior or exterior hardscape surfaces and protects against UV degradation, staining, fading, and weather damage.
NanoPave Hardscape Sealer is available in (3) ready-to-use sheens; Natural Look Finish - Low Sheen; Enhanced Look Finish - Semi Gloss; Wet Look Finish - Gloss. Each is simple to apply using a pressurized pump sprayer in conjunction with a handheld squeegee or tight nap roller as needed.
Friday, August 12, 2016
Magnolia Community Built Micro-park, Forth Worth. What Happened?
May 2016. New Community Built Micro Park in Forth Worth, Texas has been created on an empty, unused space on Magnolia Avenue. Some reports say it was a miracle, starting from dirt, transforming into a colorful place with neon-colored zip ties atop of solar-panel lights, city art project. A quick tutorial on installing artificial grass.
Tuesday, August 9, 2016
NanoPave JSS Project Showcase - June 2016
NanoPave JSS (NP-JSS) is a revolutionary 2-in-1 joint stabilizer and sealer product for use with pavers, natural stone, and flagstone. NP-JSS creates a strong, durable bond in common sand or crushed stone jointing materials for joints up to 4” wide. NP-JSS is also a UV resistant, VOC-free sealant that protects and helps maintain the natural beauty of most paving surfaces.
Advanced Formula NanoPave JSS is an industry leading, water-based, VOC-free, liquid nano-polymer stabilizer. Common jointing materials such as masonry sand in joints less than ¾” or crushed stone mixes in joints up to 4” are bonded by topically applying to most hardscape surfaces. Stable joint materials improves surface stability, and also reduces erosion, insect infestations, and weeds.
NanoPave JSS is also a fast curing, long-lasting sealer with ultra-high clarity that can be applied in a surface and ambient temperature range of 40º - 90ºF. It is suitable for application to dry or damp surfaces, which is ideal for new installations or restoration of existing hardscape projects. NP-JSS is available in two breathable sheens; Natural Look Finish - Ghost; Enhanced Look Finish - Gloss.
Saturday, August 6, 2016
BarkSealer Product Demo | Restore or Recolor Any Bark or Mulch Ground Cover
BarkSealer is a water-based color refreshing sealant used to restore or recolor any bark or mulch ground cover material. BarkSealer is ready-to-use as a color protectant for dyed mulch material or it can be blended with any of three Colorant Concentrate additives to add vibrant, new color to any ground cover.
Application is easy with a common handheld or backpack pump sprayer. BarkSealer defends against UV ray and weather degradation to the natural appearance of bark and mulch with a protective coating that is safe for use around pets and any landscaped environment.
BarkSealer Colorant Concentrate is sold separately and available in three options; Redwood (red), Oak (brown), Obsidian (black). One 16-ounce bottle of Colorant Concentrate mixes with 5 gallons of BarkSealer at a rate of 3.2 ounces per gallon.
Wednesday, August 3, 2016
How To Repair Potholes And Damaged Asphalt Pavement
BackYard Basics by TechniSoil with host Terry Jensen. Here’s a problem we all deal with nearly every day, potholes and uneven blacktop. In this episode I’ll show you a fast, easy way to repair any asphalt surface including driveways, parking lots, aprons, and sport courts. Introducing TrowelPave from TechniSoil, an eco-friendly leveling compound that does not require any mechanical compaction. All you need is a standard trowel to install.
I’ll be working on a badly damaged and uneven asphalt shop encroachment. There was a jagged, crumbling 2” - 3” gap from the concrete shop floor down to the pavement. Small boards and stakes were being used to fill the space so wheeled appliances could be rolled in and out. Needless to say, it was a nuisance and tripping hazard not to mention it looked horrible.
TrowelPave doesn’t require any specialty tools or heavy equipment, and the repair will actually be stronger than the existing asphalt itself! The proprietary blend of aggregates and liquid binder is easy to mix using a wheelbarrow and shovel or garden hoe. The blended mix allows for 20 - 30 minutes of workability to shape and compact using a concrete trowel.
First I cleaned the area of debris by removing any broken concrete and asphalt with my shovel and then brooming any remaining material out. A handheld or backpack blower would also work well. If you need to use water or high pressure spray to clean, it’s important the project is completely dry before installing TrowelPave.
A TrowelPave kit comes in a bucket with a balanced amount of specialty aggregates and liquid binding agent. In this video, we used the DIY kit which comes with approximately 20 pounds of aggregate and 16 ounces of binder. There will also be a contractor kit available that features 40 pounds of aggregate and 32 ounces of binder.
It is recommended to wear personal protective equipment (PPE) at any time once the liquid binding agent is in use. This would include work pants, shoes, and shirt (preferably long sleeve), gloves, and safety glasses. The liquid binder is non-hazardous, VOC-free, and environmentally safe. On rare occasion, it can cause irritation after direct contact to the skin of people with certain allergic reactions. Avoid contact with your skin or clothes if possible.
Next I began the mixing process by pouring the aggregates into my wheelbarrow and then emptied the contents of the liquid binder evenly over the top. I used a shovel to thoroughly mix the two components. The mix starts out clumpy, but quickly blends together into an oatmeal consistency. The asphalt version of TrowelPave features a tinted binder that becomes more consistent while mixing.
And finally, I poured the blended material into place and began to trowel. If you have ever finished concrete or mortar with a trowel, the process is similar. I was able to build a ramp from the asphalt up to the jagged concrete shop floor. I troweled the material in about a ¼” higher than finish grade and then evenly tamped it down by hand using my trowel until it was flush. In areas where the grade was low, I sprinkled more blended material over the top and continued troweling and tamping.
On this repair area, I used 4 of the DIY bucket kits and the project was complete in less than 30 minutes. Within days, the owner had used the new ramp into the shop to drive heavy equipment on without so much as even a scratch.
If you watch to the end, there’s a bonus sneak peek of another new product coming soon from TechniSoil called Color Refresh. You can recolor old, faded asphalt with a handheld pump sprayer. Stay tuned for this and more great products coming soon!
Sunday, July 31, 2016
NanoPave Hardscape Sealer Product Demo
NanoPave Hardscape Sealer is a water-based, VOC-free, nano-polymer sealant for hardscape surfaces including pavers, bricks, natural stone, and flagstone. It is also commonly used to seal decorative stone ground cover materials such as river cobble, beach pebbles, and specialty aggregates. NanoPave Hardscape Sealer enhances the natural color of hardscape materials and ground covers.
NanoPave Hardscape Sealer enhances and protects the natural beauty of hardscape surfaces using an ultra-high clarity, nano-polymer sealer technology. With excellent adhesion to both porous and dense surface materials, it provides protection without blushing, yellowing, or cracking. It's a breathable sealer that applies easily to interior or exterior hardscape surfaces and protects against UV degradation, staining, fading, and weather damage.
NanoPave Hardscape Sealer is available in (3) ready-to-use sheens; Natural Look Finish - Low Sheen; Enhanced Look Finish - Semi Gloss; Wet Look Finish - Gloss. Each is simple to apply using a pressurized pump sprayer in conjunction with a handheld squeegee or tight nap roller as needed.
Thursday, July 28, 2016
How To Repair Cracked Concrete In An RV Driveway Sports Court
BackYard Basics by TechniSoil with host Terry Jensen. Our repair project is right in the middle of a combination concrete RV driveway and sports court. I’ll be using TrowelPave to repair jagged concrete corners that cracked and flaked away near the intersection of two expansion joints. The damage is spreading over time and becoming a dangerous nuisance.
An ankle-breaker on a basketball court is great when you’re trying to shake loose from a defender, but bad news when it’s literally a rolled ankle from stepping in a hole! This sports court is placed in the middle of a long RV driveway on the side of the home. It’s used for everything from basketball to skateboarding and is one of the most popular places to be at any backyard pool party.
The concrete is in relatively good condition overall, but over time the edges and corners near expansion joints have began to flake and crumble away. It is a constant source of debris on the court but more importantly it poses a risk to anyone who steps in the hole awkwardly.
First off as with most any project, I cleaned the area of loose debris. In this case, I used a screwdriver and pronged gardening tool to remove chipped and flaking concrete. After sweeping up the big pieces, I used the backpack blower to remove the remaining dust and particles. A pressure washer could be used to clean an area like this, but it’s important the area is dry before applying TrowelPave (no standing water).
Next, I opened up (1) 20 pound TrowelPave Concrete kit. The beauty of TrowelPave is it’s ease of application and strength in the most uneven repair areas. One DIY kit covers anywhere from 1 square foot at an average depth of 2 inches all the way up to 8 square feet at an average depth of a ¼”. My kit easily repaired small, miscellaneous damage areas within a 20 ft2 area.
Mixing the TrowelPave specialty aggregates and binder is easy and only takes a minute or two. It’s very similar to mixing a bag of ready mix concrete. I used a shovel to mix thoroughly inside of a wheelbarrow. The dry, sandy aggregates will begin to change color during mixing. Once the color is even throughout, the blended mix is ready for install.
I shoveled the material into place and started in with a small, round edged concrete trowel. The blended mix is not sticky so it’s easy to spread around and fill in cracks and divots. There is no need for any type of mechanical compaction with TrowelPave, all I had to do is pack down by hand with my trowel.
There were a couple handy tips that made this job go quickly. First, I needed to fill in narrow, linear expansion joints that can make it tough to evenly grade. The trick is to scrape some TrowelPave mix into a row over the repair area that is about an ⅛” to ¼” higher than grade, then pack it down with the trowel. The result is a nice, evenly finished surface.
The second tip is helpful to wrap up the project. I used a small whisk broom to lightly sweep away loose TrowelPave mix. I was careful not to disrupt my repair patch and it made cleanup easier than you would expect. TrowelPave has a workability of anywhere from 15-30 minutes depending on temperature, so I took my time on the repair which was complete inside of about 20 minutes.
And that was it, done! I set some traffic cones up around the repair so it wouldn’t be driven or walked over. TrowelPave begins curing quickly, setting up hard within hours. But it’s best to allow 12 - 24 hours to fully cure and there shouldn’t be any water in contact during that time. No more ankle-breakers on this basketball court except for a defender getting crossed up by a shifty ball handler!
Monday, July 25, 2016
Keep Bark And Mulch Ground Cover In Place
BarkBinder is a liquid polymer stabilizer that limits wind and water erosion of fibrous, shredded mulch and bark ground-cover products in landscaped areas while helping to preserve their natural appearance. BarkBinder concentrate dilutes with water, providing for an easy spray-on application process that is completely safe for plants, animals, and the environment. Maintaining a beautiful landscape is easy with this cost effective solution for mulch products.
Rain and wind can wreak havoc on mulch planter beds, resulting in expensive and time-consuming replenishments. By locking mulch into place, planter beds not only look better for a longer period of time but they support better water retention for plants, shrubs, and trees and reduce weed growth. BarkBinder topically applied liquid stabilizer acts like hairspray for shredded bark and mulch products, pine straw, and more.
BarkBinder is applied easily using an ordinary handheld pump sprayer. The liquid is water-based, VOC-free, and will not harm an existing landscaped area. The crosslinking bond reduces erosion, but still allows for natural decomposition of ground cover materials along with water transfer to the soil and plant growth below such as bulbs or perennials.
Friday, July 22, 2016
NanoPave Concrete Sealer Product Demo | Clean And Seal A Concrete Walkway
NanoPave Concrete Sealer is a water-based, VOC-free, nano-polymer sealant for finished concrete surfaces including smooth, broomed, colored, stamped, exposed aggregate, and more. It enhances and protects the natural beauty of embellished concrete surfaces using an ultra-high clarity, nano-polymer sealer technology. With excellent adhesion to concrete despite the finishing technique used, it provides protection without blushing, yellowing, or cracking.
NanoPave Concrete Sealer is a breathable sealer that applies easily to interior or exterior concrete surfaces and protects against UV degradation, staining, fading, and weather damage. It comes available in (3) ready-to-use sheens; Natural Look Finish - Low Sheen; Enhanced Look Finish - Semi Gloss; Wet Look Finish - Gloss. Each is simple to apply using a pressurized pump sprayer in conjunction with a handheld squeegee or tight nap roller as needed.
Tuesday, July 19, 2016
Understanding Concrete, Cement, And Mortar
Steps for Understanding Concrete, Cement, and Mortar:
1. Portland cement is a fine gray powder that hardens when mixed with water. It's seldom used by itself but is an important ingredient in many other masonry products.
2. Concrete is a mixture of portland cement, sand, and an aggregate, such as gravel or coarse stone.
3. Concrete is mixed with water, then poured or pumped to create foundation walls, footings, piers, slab floors, driveways, steps, and sidewalks.
4. Once fully cured, concrete can support immense structural loads.
5. Mortar is a mixture of cement, lime, and sand, and is commonly used to hold together bricks, concrete blocks, and stones.
6. Masons use a wide variety of trowels to apply, spread, pack, and tool mortar.
7. When cured, mortar is somewhat softer than concrete, which allows it to accommodate a small amount of movement in a wall without cracking or crumbling.
8. Concrete, cement, and mortar are available in various strengths and mixtures, so be sure to get the right one for your job.
Saturday, July 16, 2016
How To Cut And Shape Stones
Roger Cook demonstrates how to cut and shape stones for hardscaping projects.
Wednesday, July 13, 2016
Dry Creek Bed
This video was filmed over a number of weeks. It included a crazy paved path over an introduced dry creek bed, lined with river rocks and pebbles. We designed a native layout of planting for the front yard.
Sunday, July 10, 2016
Thursday, July 7, 2016
How To Clean And Restore A Brick Paver Patio In A Few Hours
BackYard Basics by TechniSoil with host Terry Jensen. In this patio makeover episode I will show you how easy it is to clean and restore an aged brick paver patio. It sounds like a lot of work, but it’s actually easy to do it yourself over a weekend. I finished this entire outdoor living hardscape project by myself in less than four hours total. Whether you hire a contractor or go the DIY route, this video will show you how to bust out the job quickly so your patio will be ready for a friendly barbecue party or some quiet time reading a book.
This paver patio and adjacent walkway area was very dirty and covered with green and black algae. We started by pressure washing the bricks with a gas powered pressure washer which took about 45 minutes. It’s important to clean evenly back and forth with the spray wand, almost as if you were painting a fence. I tried initially using an electric pressure washer but found the jet stream was now powerful enough to clear out the grime and algae. The gas powered unit worked great and made the cleaning process go quickly. If the water dries in time you can move on to the final restoration steps, but on this project, I decided to give it more time to dry and returned to finish the following day.
Next, I installed two colors of UltraMix Designer Series Paver Joint Sand from TechniSoil. This patio was a combination of red brick pavers and charcoal-tan-plum keystone wall blocks for elevation. I used Brick Red and Charcoal Plum UltraMix Sand, and it tied the contrasting colors together beautifully. UltraMix Sand is not a polymeric sand, but can be used in a dry joint sand application or stabilized with a liquid stabilizer. Polymeric sands have an extremely limited color selection and can cause issues like hazing from polymeric powder dust.
Finally, I wrapped up the project by applying NanoPave JSS (2-in-1 Joint Stabilizer & Sealer) with an everyday handheld pump sprayer. NanoPave JSS performs two necessary jobs for hardscaping, by stabilizing the joint material and sealing the stone surface. The sealer enhances the natural color, and for this job we used NanoPave JSS Ghost - Natural Look Finish. The liquid sprays on white, but dries ultra clear. I used a foam rubber squeegee to evenly distribute the liquid over the pavers and I was careful to apply according to application rate and temperature recommendations.
When the makeover was complete, I had spent only a few hours transforming the outdoor living patio area from old and dingy to bright and beautiful. We used only TechniSoil products to enhance the project, specifically UltraMix Paver Joint Sand and NanoPave JSS. For products and ideas like these and more, visit TechniSoil.com or any of the TechniSoil social media channels.
Monday, July 4, 2016
Backyard Paving Remodel
http://www.landscapingnetwork.com See how to dress up a plain-gray concrete patio with acid stains and then carve it to look like paving stone. Coordinating brick steps and borders complete the makeover.
Friday, July 1, 2016
Modern Front Yard Remodel
http://www.landscapingnetwork.com This modern front yard landscaping was a remodel from the existing yard. Excavation was done to open up space for a fire pit, dining area, front lawn, planters and retaining walls. See how this modern front yard was designed and the materials that were used by landscape architect Ive Haugeland from Shades of Green Landscape Architecture.
Tuesday, June 28, 2016
Contemporary Front Yard Makeover
Does your front yard need a new lease of life? Jason gives a little front garden a whole lot of street cred with a modern picket fence and garden to match!
Saturday, June 25, 2016
Create The Ultimate Family Garden
Johanna, Adam and Jason team up to create a garden that is guaranteed to keep the whole family happy! From an amazing veggie patch to the perfect chill-out zone.
Wednesday, June 22, 2016
How To Build A Planter Bench - This Old House
Senior technical editor Mark Powers demonstrates how to assemble a bench between two planters made from stacked cedar boards.
Sunday, June 19, 2016
DustCube Product Demo
Get better air quality and save water with DustCube from TechniSoil. DustCube is 250 gallons of ready-to-use, environmentally safe liquid polymer emulsion that provides seasonal dust control by adhering small dust particles to larger particles, preventing them from becoming an airborne irritant. DustCube treats up to a 1/10 mile of gravel, base rock, or dirt driveways and roads directly from the back of standard pick-up truck or trailer bed. Simply load DustCube, connect the T-Bar Applicator, and drive.
Thursday, June 16, 2016
UltraMix Designer Series Paver Joint Sand Product Demo
UltraMix Designer Series Paver Joint Sand is a premium blend of vivid colored sand for use with paver, flagstone, brick, and natural stone joints up to 1” wide. The UltraMix dust-free formulation provides superior structural strength during installation and prevents hazing issues when stabilized with liquid polymer NanoPave Joint Stabilizer & Sealer (JSS).
UltraMix is available in a wide variety of elegant colors and color blends, perfect for complimenting the most popular paver and hardscape surfacing products. UltraMix Sand goes through a proprietary color infusion process that results in a permanent, vivid color blend.
UltraMix Sand meets ASTM C-144 requirements for masonry and hardscape joint material sand. It installs quickly and easily by simply brooming into hardscape joints. UltraMix can be installed dry but is recommended for use with NanoPave JSS for stabilization and color enhancement.
Monday, June 13, 2016
Friday, June 10, 2016
Tuesday, June 7, 2016
Patio Ideas - Beautiful Patio Designs For Your Backyard
Patio Ideas and Designs That Will Make Your Yard Pretty.
If you are wanting to create a beautiful yard and need some ideas for your patio than watching this video will help you get that built. In this video we will show you several patios with bricks, fireplaces, pergolas, porches, stone and more.
Saturday, June 4, 2016
Top 3 Reasons To Install A Lawn Sprinkler System In Your Yard

After all the hard work, it is a wonderful feeling when you see your plants finally blooming and your trees bearing fruits. When plants bloom, it is not the end of your gardening job. In fact, the challenge has just begun. How long would you be able to maintain your yard vibrant and green, especially when you are in sunny San Diego?
San Diego weather is mostly sunny and semi-arid throughout the year. Summer is normally warm and dry, although winter is milder compared to other states. If you are a serious gardener, you know how difficult it is to maintain a green courtyard against summer heat. Installing lawn sprinkler system is very important to keep your plants in bloom throughout the year in San Diego.
Here are the top 3 reasons why you need to install lawn sprinkler on your yard:
1. Aside from maintaining a lush green courtyard even during summer, installing an effective irrigation system conserve plenty of water. It is estimated that 70% of water usage in many households occur outside the house. With lawn sprinkler systems, 40% of this outside consumption can be saved. Compared with using a hose to water your yard, an irrigation system uses less water to keep your grass green and nourished. When dry season comes, you do not have to worry about your plants drying up.
2. Depending on the type of irrigation system you got, it can provide even coverage to your area. All your plants will receive the same amount of water at the same time. No plant will be too thirsty or too swamped with water.
3. If you choose to install automatic sprinkler systems, you can save a lot of time since you simply have to set the controls then you can forget about your lawn all day. Even turning the system off should not be a cause of worry since you can set it based on your schedule.
Installing lawn sprinkler system can be done by a homeowner or by lawn sprinkler experts. For the DIY sprinkler system, first, you have to make a layout as to where you will put your lawn sprinkler system. Then, dig trenches, make sure they are level, and place your PVC pipes in the trenches. Join the pipes using cement so that they are strong enough and that they would not leak. When you are finished with the hardest part, begin installing the sprinkler heads on tees. Then tap into the water supply line, install a shutoff valve and a stop-and-waste valve, and test the system if it works.
Better yet, you can seek the services offered by reputable lawn experts. Aside from doing all the dirty work, professional installers allow you save your money and time in many ways than one.
Having someone do it for you makes the job faster than you trying to do it by yourself. The yard will not be a mess for a long period, the lawn sprinkler will be put to test immediately, and your yard will start to get greener sooner.
Professional maintenance service providers also know where to plot out individual sprinklers in the system and where they will be most effective.
To make sure that your plants remain vibrant throughout the year, install sprinkler system in your yard.
Article Source: http://EzineArticles.com/4279776
Wednesday, June 1, 2016
How To Sheet Mulch Your Garden
Creating a weedless garden in less than 7 minutes.
Fun Green Guy shows you the whole process, from start to finish, of building a garden bed that preserves soil structure, prevents weeds, and is easy to maintain.
Sunday, May 29, 2016
Lawn Striping "How To"
Introducing the new The Toro® Lawn Striping System for homeowners. Now you can pattern your lawn like the pros! It attaches easily to most walk-behind mowers and can be used with and without the bagger attached. All you need is a Phillips Screwdriver and 16-20 lbs of dry sand. Start planning your pattered lawn today.
Thursday, May 26, 2016
Monday, May 23, 2016
Friday, May 20, 2016
BarkSealer From TechniSoil, DIY Color Enhancer For Any Bark Or Mulch Groundcover
BarkSealer is a ready-to-use sealant that enhances and preserves the natural or dyed color of bark and mulch ground cover materials. It is eco-friendly, VOC-free, and easily applied using a common handheld or backpack pump sprayer.
BarkSealer defends against UV ray and weather degradation to the natural appearance of bark and mulch with a protective coating that can be applied to any bark or mulch ground cover material. Application is fast, simple, and safe for use around pets and the landscaped environment.
BarkSealer is also available with three colorant additive options (sold separately); Redwood (red), Oak (brown), Obsidian (black). By mixing the colorant additive directly with ready-to-use BarkSealer, any natural or dyed ground cover material can be restored back to its original, vibrant color quickly and easily.
Tuesday, May 17, 2016
Rain Bird - Drip Irrigation Tips
To Drip or not to Drip? That is the question Michael answers in this Episode. Michael says drip irrigation is not just for watering pots,
flowers and shrubs; but can be the best method for watering trees as well.
A common assumption is that the secret to having a green and healthy yard is water, water and more water. Nature is struggling to meet our ever-increasing demands for water and we are facing drought conditions with water rationing in some parts of the country. Simply put -- there is a limit to how much water we can consume without ever-increasing consequences.
With summer here and the height of the watering season upon us, it is time to make sure all of us are doing our part to conserve water and at the same time keep the water bill down. Michael Glassman is an award winning landscape designer and in this weekly podcast series offers tips on how to save water and still have a great yard. Michael has twenty years of experience in the field and has been featured in such publications as Sunset Magazine, Fine Gardening, Better Homes and Gardens, and Landscape Architecture. He is designer and co-host of the Discovery Home Channel program Garden Police.
Saturday, May 14, 2016
How To Prep For Sod
To prep a yard for sod, it is important to aerate the soil before applying a layer of compost and laying down the sod itself. Prepare a yard for a fresh layer of sod with helpful hints from a Habitat for Humanity volunteer in this video on landscaping.
Wednesday, May 11, 2016
How To Lay A Brick Paver Walkway
In this video, This Old House landscape contractor Roger Cook shows how to lay a beautiful and long-lasting pathway.
Sunday, May 8, 2016
Garden Rock Wall
We check out the simple rock wall at Out in the Garden Nursery and get some tips for building one ourselves!
Thursday, May 5, 2016
Salsa Cruda - Tomato Salsa Recipe for Cinco de Mayo
Learn how to make a Salsa Cruda Recipe! - Visit http://foodwishes.blogspot.com/2012/05/almost-cinco-de-mayo-salsa-cruda.html
Monday, May 2, 2016
How To Lay Out Gravel Landscaping : Landscaping Basics
Laying out gravel landscaping is very important for a couple of different reasons. Find out how to lay out gravel landscaping with help from a landscape designer in this free video clip.
Friday, April 29, 2016
Minimalist Garden Design Ideas
Minimalist gardens may seem boring, simple and plane to many but there are many others that think they are stylish and charming.
Tuesday, April 26, 2016
Installing Pavestone Bagged Landscape Rock
Beautify your trees, gardens, bushes and other outdoor areas with Pavestone's landscape rock. Sold in easy to use bags.
Saturday, April 23, 2016
How to Build a Wood Lattice Fence
In this video, senior technical editor Mark Powers builds a cedar fence featuring square lattice and chunky posts creates a decorative yard accent that'll stand up to any climate—and plenty of neighborly ogling
Wednesday, April 20, 2016
Stylish Elegance Of Brick Retaining Walls

Ask about the most basic part for building any structure, and chances are, there will be a universal answer: Bricks. Bricks, hard blocks made from clay, are proven materials for house and building constructions. Hence, there is no reason to doubt their efficiency and beauty when it comes to retaining walls.
Indeed, brick garden walls are one of the most popular choices among many homeowners. First, it's because bricks are the first things that come to mind whenever a person is confronted with the prospect of creating a wall. And second, it's because bricks allow a lot of flexibility with design elements that can eventually be manipulated to create beautiful gardens.
Garden walls are important for gardeners and landscape artists who wish to separate their gardens from the rest of the backyard sometimes, these gardens are placed in elevated areas. The purpose of retaining walls is to support the ground upon which the plants will reside. But there are more uses for retaining walls. If created with the right design in mind, they can enhance the splendor of any garden.
And this is where brick garden walls excel. Since bricks are malleable materials, at least when they have yet to harden, they can be manipulated to form a variety of shapes that will perfectly carry out the design you have in mind. Also, their surface texture will allow you to apply, and play with; paint to come up with colorful structures that will bring any environment to life.
However, you shouldn't just build brick retaining walls based on how you have always pictured them to be. Establishing these walls is easier said than done. There are sound engineering principles you should be observing.
The first step you have to take is to dig a sizable trench upon which your brick retaining walls will be built. The trench should be deep enough to support the weight of the walls, and to make it formidably resistant against the weight of the soil it will be supporting. Concrete with steel re-bar must be installed into the trench. This concrete foundation will provide a level base for the concrete blocks and brick face forming the brick retaining wall.
Also, bear in mind that retaining walls above 3 feet are subject to some permit regulations in certain areas, more specifically, territories that experience frequent seismic activities. Do consult with your local regulatory board before proceeding with the construction of your retaining wall.
A 4" drain pipe must be placed at the wall bottom on the back side of the Wall. Install gravel around the drain pipe and extending up to the top of the wall. This will help to prevent water pressure from pushing the wall over. It is also a good idea to provide weep holes along the bottom of the wall to allow additional drainage.
Conclusion: If the home has brick on the outside, try to match the same brick color into the new walls. It is important to carry the same house building material out into the landscape. This will help to unify the entire property.
Brick, stone and concrete caps can be used to finish off the top of the wall. Please note, brick retaining walls may look great but they are expensive to construct because of the cost for the concrete footing.
Article Source: http://EzineArticles.com/8952215
Sunday, April 17, 2016
How To Install A Gopher Wire Before Artificial Grass Is Installed
Gopher Wire, or Gopher Control Mesh is the best way to stop gophers and moles from destructing your artificial lawn. We recommend 1/2'' gopher wire.
Thursday, April 14, 2016
Ideas For Patios
An inspirational film filled with ideas for patios with expert advice and top tips to help you complete the job with confidence.
Monday, April 11, 2016
Installing Cobblestone Patio Pavers In The Front Yard
John of http://www.growingyourgreens shows how he installed cobblestone pavers in his front yard edible garden. From cutting concrete, laying base rock, laying sand, setting the pavers and filling the joints with sand, you will learn the entire process in this video.
Friday, April 8, 2016
Lawn Care & Design : Landscaping Around A Hot Tub
When landscaping around a hot tub, place flowerbeds around all four corners, walkways and trellises. Find out what plants to use when landscaping a hot tub, such as ivy and ferns, in this free video from a professional landscaper on lawn care tips.
Tuesday, April 5, 2016
How To Build A Round Patio With A Fire Pit - This Old House
This Old House landscape contractor Roger Cook builds beautiful circular patio that features a chill-chasing fire pit.
Saturday, April 2, 2016
ProtéShield
A water-based, inorganic elastomeric concrete waterproofer designed to penetrate, seal and protect porous surfaces from water and other liquids.
Providing excellent durability, breathability, and temperature resistance, ProtéShield’s modified-polymer formula waterproofs, winterizes and protects concrete, pavers, drywall, GFRC, gypsum, stone, tile, ceramics, foams, canvas, veneer, overlays, cementitious resurfacing compounds, asphalt, wood and most types of metal (e.g. copper, steel, iron). Ideal for large commercial or residential applications.
ProtéShield waterproofing concrete sealer prevents the penetration of contaminants that create mold, mildew and pollution damage. It’s a long-lasting protective solution designed for professional coating installers.
Wednesday, March 30, 2016
Restoring Stamped Concrete With Original Solid Color Stain
Restore and decorate your concrete with The ORIGINAL Solid Color Stain™, a pro-grade water based decorative concrete stain made especially for use with existing, unsealed, interior or exterior concrete surfaces. The ORIGINAL Solid Color Stain is NOT a paint. The advanced polymer-modified concrete stain formula penetrates the surface of porous concrete (as deep as the surface pores) and creates an opaque (solid), yet breathable finish that requires no sealer. Video footage courtesy of Aaron Oldham; Sun Masonry.
Sunday, March 27, 2016
How To Fix A Patchy, Weedy Lawn - This Old House
This Old House landscape contractor Roger Cook resuscitates a dying lawn.
Thursday, March 24, 2016
Budget Patio Design Ideas, Decorating On Budget
A dull patio in a mono-color, maybe it will not depress you, but it certainly will not stand out and will decrease the overall appearance of your home. Let's see several great ideas on a budget that can help you to decorate your patio.
Monday, March 21, 2016
Wood Chips In The Garden
Using this FREE material can save you a lot of work and a lot of water. They are also good for the trees!
Friday, March 18, 2016
How To Make An Outdoor Concrete Fire Pit
This modern outdoor concrete fire pit is can be built over a single weekend and is great centerpiece for outdoor entertaining. This is not a difficult project but is time consuming and labor intensive. Concrete fireplaces and fire pits should be constructed carefully. When exposed directly to high amounts of heat the moisture trapped inside concrete can expand causing the concrete to crack and in extreme situations explode. I lined the inside of the fire pit with fire brick and filled the bottom with lava rock to ensure that the majority of the heat form the fireplace is not coming in direct contact with the concrete. Please check out my website for more detailed instructions.
Tuesday, March 15, 2016
How to Build a Concrete Block Wall
With this video we'll show you how to properly set the corner block and build each course for a straight, level and structurally sound wall. Sakrete makes a number of products for masonry projects. To install a block wall, Sakrete Type S Mortar Mix is a great product. Constructing a wall can be a challenging project.
Sunday, March 13, 2016
How Fast Do Woodchips Decompose?
Mittleider vs. Back to Eden
This series is a review of gardening methods that I am using from both the Mittleider Gardening Method and the Back to Eden method. How fast do woodchips decompose?
Many people have asked how fast the woodchips decompose. This video goes over different sizes of woodchips and how fast they have decomposed and why the differences.
In the video it sometimes says "Two" things and sometimes says "Three".
The three most important things that help speed up the composting of the woodchips in order are:
1. Nitrogen
2. Fungal "Mushroom" spores
3. Mineral Rock Dust
Wednesday, March 9, 2016
Playground Wood Chips At Dixon Landscape Materials
Raj with Dixon Landscape Materials shows us their very popular playground wood chips, which is made from Cedar and certified for playgrounds. It is also used all around the garden, parks and so on.
Call Dixon Landscape at 707-678-8200 and visit their website at www.dixonlandscape.com
Sunday, March 6, 2016
Landscaping Design Ideas For Your New Home

The internet is a great place to go for your landscape design ideas.
Being a homeowner in these hard economic times, you will be looking for ways to save time and money on your yard. There are many ways that you can do this project inexpensive, so you can enjoy your new yard.
Yes you can do this yourself and a great way to start your landscape project is to get design ideas. Look at books and newspapers then gather the ideas. Then you and your family can get some ideas on your yard project for this spring. You may consider buying in bulk to save money. You can have your family and friends help pay when you buy in bulk. This will help when doing some yard projects this year.
Ask around then you may purchase your landscaping supplies in bulk. Mulch is used in most yard projects this is less expensive when buying in bulk. In addition, when your plants have matured such as day lilies and hostas you may divide in to smaller clumps. Then spread into your landscaping garden. Share with your friends and family. My friend did work in a garden center and every spring he would brake up the day lilies and the hostas into smaller pots.
There are many ideas you can look at for your landscaping project. The look of your home may determines the shape and the arrangement of the lawn you can work with. You will need to remember the four seasons of the year, to compliment the types of the plants you plant in your garden; depending were you live.
You can always go to your local garden center and ask for your nearest landscape designer. Here are some ideas, you can put to work. So you and your family can get out and enjoy your new yard.
Article Source: http://EzineArticles.com/4131888
Thursday, March 3, 2016
Gravel-Lok - Garden Path Installation
Gravel-Lok instructional video featuring tips and tricks from the pros.
Monday, February 29, 2016
Increasing A Homes Value With Landscaping
Landscaping can add thousands of dollars of value to your home according to Cam Merritt, Demand Media. The instant added value grows as the plants grow fuller and mature over time. Plus the true value of landscaping lies in the feelings you get when you pull up to your home. Don't believe it? An article in Miller-McCune mentioned several research studies related to the positive impact of nature. Having plants, going for walks in the park, or even looking at landscapes could produce psychological benefits, reduce stress and improve concentration.
Year after year, home owners spend multi-billions of dollars creating beautiful escapes right in their own properties. Whether you or company, the front of your home is the first to greet you or guests. And your back yard is a get away from the outside world. All this comes at an affordable to a national debt price. So if you don't have your own nation of tax payers to pay for your every whim and fancy, let's start small.
One of the easiest ways to dress up your yard is adding mulch. Adding about a 4 inch layer of mulch around tree bases, or your flower beds to help control weeds. Plus mulch keeps moisture from evaporating. As mulch breaks down it makes a healthier soil that will translate into healthier plants. The preferred mulch depends on how and where you intend to use. Shredded bark or mini-chips are used for walking paths, compacting well and make for level footing. Around trees or shrubs where people won't be walking, larger size bark nuggets can last for years. In warmer areas, inorganic mulches (stone or volcanic rock) keep the ground cooler. When adding another layer, never get to deep as to hamper air flow and moisture to the plants.
When home owners begin to look at landscaping, often they over look the Hardscape elements. (walkways, paths, decks, fences, patios and buildings) Hardscaping is any non-living part of the landscape. Beyond the normal repairing and painting of wood or metal pieces, note what has to be done to concrete or stone surfaces. A simple cleaning and edging can make a world of difference. If your yard is large, adding another path made with mulch, bark chips or stone will break up a large lawn. Paths that curve to a corner garden or park bench gives an estate feel.
Add a decorate fence or trellis to hide unsightly views. (garbage cans, mulch piles, neighbors) Planting climbing vines, flowers or even edible plants create even softer looks. Stone walls give more of a harder dimensional look adding levels to a normally flat area.
Don't forget about gazebos. Most people believe that a gazebo is some huge structure. Today's homeowners simply have to drive over to the local Do-It-Yourself store. Most difficult part of these kits may come down to which one to buy. Instructions have been written to be clear and designed to be easily assembled in less than a day. With screening, you have an extra room to enjoy those summer nights.
Have you ever driven past a house during the day only to think nothing of it? Later, after dark, see it lit up and say WOW! Landscaping lights can make a night and day difference. ( Sorry, just couldn't resist) If you were thinking of lighting, first ask yourself "what do I want to accomplish?" A soft romantic mood. High light a fountain, part of your home or something specific in your garden. Maybe just to accent a path or walk. Not to mention the security aspects. Crooks love shadows. As you begin to focus on the things to be lit, types of light, color and spacing will take shape. There's a great variety of 12 Volt lighting systems to give DIYers the chance to add lighting without the costs of an electrician.
As you create a planting plan, keep it simple. Look around your neighbor hood to get ideas of what mature gardens will look like. You may want to also consider seasonal flowers. If you like fresh flowers, plant flowering plants for each season. Layers of flowers or ground cover. Trees or shrubs. The good news is it doesn't have to be done all at once. You can start with a tree and a couple of plants. The next year, some bushes. As your project gets going, it may even change from the original plan. A special note on trees and to some extent bushes: Think Ahead! Trees and bushes are excellent additions to any landscaping project but they are the hardest to change. A tree which is a great accent when it's 4 foot tall can completely eliminate the view you were trying to promote as it grows. Bushes can over grow walks and paths. When choosing, pay careful attention to growing heights and spans. Trees planted to close to the house can grow to destroy gutters and roof shingles.
The personal touches. Yep! Nomes, globes, metal animal shapes, even wind chimes gives that personal touch. Whether plastic birds or rocks with funny saying, all these are your signature to your artwork.
Lastly, don't forget the yard furniture, lounges, chairs and patio table set. Why would you want to put all the effort in if you and your friends can't enjoy it? Sit back, take a long cool sip and enjoy!
Article Source: http://EzineArticles.com/8457544
Subscribe to:
Posts (Atom)